
How To Make Halloumi And Whey Ricotta From Scratch – A Complete Guide

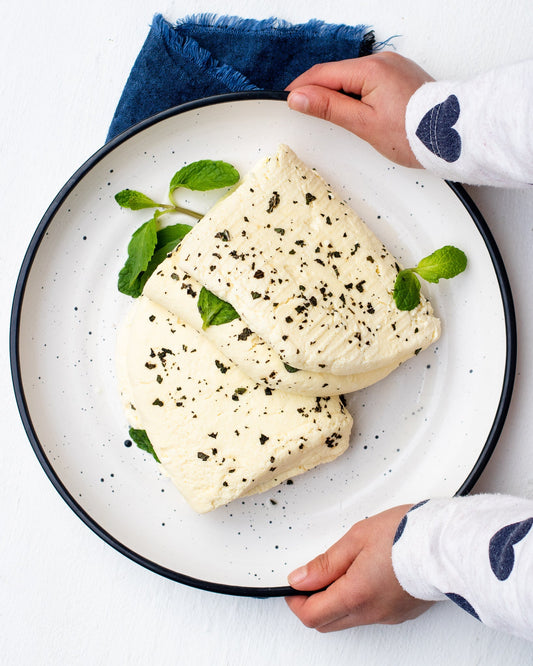
Halloumi, the acclaimed Cypriot cheese. Halloumi is a salty semi hard cheese made from milk curds that require no added cultures to be produced. It is well known for its squeaky nature when eaten, however that is not always the case as it depends on its aging process and milk used. For example halloumi that has been stored in brine has a more mature and harder texture, hence there is no form of squeakiness. At the same time halloumi made with just goat’s milk results in a harder texture but the addition of sheep’s milk helps soften it.
Halloumi has been trademarked as a Cypriot product since the 90’s, despite a short period of recent revocation which has since been restored. Under the collective community mark, halloumi is produced only in Cyprus with certain ingredients and production methods, while the producers are Cypriots and are registered in Cyprus. Halloumi is very important to the Cypriot economy, and accounts for over 15% of the country’s total domestic exports.
Traditional halloumi making
Traditionally halloumi contains goat’s and sheep’s milk only. However over the years the need for halloumi became very high, due to its globalization, and dairy farmers could not meet the demand. Goats and sheep are not able to produce a lot of milk during the hot seasons, which as we know in Cyprus there are prolonged high temperatures. Therefore cow’s milk began to be added in the blend as there was more of it available.
I came across a great short video showcasing the traditional way of making halloumi, using the woven baskets (ταλάρια) to expel the whey and adding only goat’s and ewe’s milk in the mixture. Traditional Afrodite’s halloumi made in Cyprus is available in Australia in some Woolworths and Coles stores. Also if you are in NSW in Australia, Galaxy traditional halloumi, imported from Cyprus is available in a few delis and specialised food stores from what I’ve seen.


My experience with halloumi making
The first time I saw halloumi and ricotta being made was at my husband’s aunty’s house, theia Maria, in Cyprus a few years ago. Then at Easter time in 2019 I had the opportunity to spend more time with her, as she was making cheese for the traditional Cypriot pastries, flaounes. Theia Maria makes traditional cheeses using milk from their farm and sells it to the locals. So I felt very privileged to be able to document her as she was working as well as listening to her explaining the cheese making process. And even more so to taste fresh warm cheese in the end.
A few months after our return from Cyprus, under the most fortunate circumstances, I was approached to help at the 2nd Annual Halloumi Festival hosted by the Cyprus Community of Melbourne. I was asked to be the presenter during the four separate halloumi making workshops at the festival and I quickly jumped to the opportunity. My role was to speak and explain the steps involved, while a group of experienced halloumi makers were working to turn somewhat 50L of milk each time into halloumi from scratch. So I took it upon myself to be as much of an expert in that role as I could, because the audience’s understanding dependent on it and of course they would ask questions, which I needed to be able to answer.
Then the real fun begun! I was determined to educate myself more and make my own halloumi and ricotta from scratch. I had learnt a lot from my husband’s aunty to begin with, I then researched, read and watched countless of videos before I felt ready to attempt the process myself. And I have to say the first time was quite successful but improvements needed to be made and it only left me with more questions I wanted answered. Hence after multiple attempts, I am more confident in writing this blog post with as much detail as I possibly can, so you don’t need to spend countless hours doing it! Here is an article from Neos Kosmos about the halloumi festival and the workshop, including a snippet video of my presentation and some of my photos.


Please do not be intimidated by my long post, the actual process is easier than you think. The teacher in me just wants you to be well informed, beginning with the explanation of some of the terms and then of course the method! Read through the information beforehand, study the process photos, watch my YouTube video or on IGTV and then follow the recipe to make your own halloumi from scratch.
Pasteurised vs Non pasteurised milk
Pasteurisation simply means that the milk has been heat processed to eliminate any possible microbial growth. It is the safest way to enjoy milk for all its health benefits. Non pasteurised milk, also referred to as raw milk, is not heat treated in any way and hence commercially it is not seen in supermarkets readily available. However, traditionally non pasteurized milk is used for halloumi making. The milk is heat treated through the process of rising temperatures when the halloumi is cooking. I was only able to get in contact with one supplier of raw goat’s milk, Jannei, as I wanted to recipe test that version also. However due to the drought earlier in the year followed by the bush fires in NSW, the supply of raw goat’s milk has been extremely low. If I get the chance in the future to use raw goat’s milk I’ll add an update on this blog post.
Homogenised vs Non-homogenised milk
In general most of the milk bottles found at the supermarket these days are of homogenised milk. Homogenisation basically means that the fat particles and proteins in the milk are broken up into smaller parts so that they are dispersed evenly by a high pressure procedure. It does not involve any chemicals and it does not make a difference to the quality of the milk. However homogenisation does make the milk look whiter and taste smoother as the yellow fat is evenly distributed.
Non-homogenised milk, or also called cream on top, means just that. The yellow fat is found on the top of the milk usually and you may disperse it through the milk simply by vigorously shaking the bottle. To make halloumi from scratch I’ll be using non homogenised milk as it means the proteins have not been broken up and are able to hold together during curd formation. If you wish to use homogenised milk instead, you will have to add calcium chloride in the milk first as well as the rennet to help with the coagulation.
Through my numerous recipe tests making halloumi from scratch, I’ve used three different types of brands of non-homogenised cow’s milk. The main difference (excluding the price) I found was the yield of halloumi in the end. The brand that resulted with the most halloumi cheese was the Demeter Biodynamic non-homogenised milk, followed by Paul’s Farmhouse Gold Cream on top and then Barambah Organics full cream milk.
Rennet
Rennet (πυτιά) is the ingredient added to help coagulate the milk into cheese curds (τυρόπηγμα). Essentially it contains active enzymes to help convert the milk proteins and fats into a solid mass. It comes in different forms including a powder, tablets and a liquid. The rennet may also be animal derived (e.g. from the stomach of calves) or plant derived. For this recipe I used the liquid vegetarian derived Mad Millie brand. With each type and brand, the amounts required vary, so read the package carefully. From my discussion with one of the cheesemakers about making halloumi from scratch, it was suggested I add double the amount of rennet as there are no other added cultures.

Equipment and ingredients required
Halloumi is easy to do at home as you don’t require complicated equipment and the ingredients are accessible. Here is a list with a short explanation next to each one:
1. Non homogenised / pasteurised cow’s milk – the type of milk required to make halloumi for this recipe.
2. Rennet – to help coagulate the milk and form cheese curds.
3. Measuring syringe – to measure the mL of rennet required.
4. Milk thermometer – to keep track of the milk temperature at the different stages.
5. Large 10L pot – to hold and heat all the milk added.
6. A second large 10L pot or container – to hold the whey once you separate from it from the cheese curds.
7. Cheese cloths or butter muslin – to wrap the cheese curd with and allow the curd to set.
8. Cheese mats or cooling racks – to place the pressed curds and then the halloumi pieces to allow the whey to be expelled.
9. Deep trays – to catch the whey expelled.
10. Wooden boards and heavy items – to push down on the curds and help expel the whey.
11. Non iodised (cooking or fine sea salt) – to brine the halloumi.
12. Fresh and dry mint – to give the halloumi flavour and help preserve it.
13. Citric acid – to help produce ricotta from the whey.
14. Ricotta basket and draining compartment – to collect the ricotta in and allow it to set.
I was able to get all the cheese specific items I needed from Bee Sustainable in Brunswick (Melbourne, VIC) or you may visit the Mad Millie website directly to order online. From Bee Sustainable it is only a 10min drive to Terra Madre (Northcote, VIC) where I find the Demeter Bionynamic Non Homogenised milk. As I mentioned already it has been the brand with which I managed to produce more halloumi out of the 8L I used.
Otherwise opposite the Bee Sustainable shop there is the Organic Wholefoods shop from where you may purchase other non-homogenized milk. In addition, Coles and Woolworths stock the Paul’s Farmhouse Gold – cream on top brand.
Steps involved
Step 1 – Cheese curd formation
The first step involves bringing the milk to a lukewarm temperature 32-35°C and then adding the diluted rennet. After less than an hour watch the magic happen… I know my kids were mesmerized! The milk will be converted to cheese curds, which will become the halloumi eventually. The cheese curds will be separated from the whey (pronounced like ‘way’ – νορό) which is the liquid they will be suspended in.

Step 2 – Cutting the curds
After the curds are formed they need to be cut. You can do that with a knife, a wooden spoon or traditionally in the village this is done by hand! Begin by cutting the curds in strips horizontally then vertically, followed by an angle from the top all the way to the bottom. The aim is to cut the curds in smaller pieces to help with the whey extraction. After cutting, the pot is heated slightly, to about 40°C, and then allowed to rest for 15min. Hence the cheese curds will start bonding.

Step 3 – Separating and shaping the curds
To separate the cheese curds from the whey you need to line a strainer with a cheese cloth and place it on top of another large pot or a bowl. The cheesecloth has very tiny holes which are perfect to help separate the solid curds from the liquid whey. But you need to ensure that you keep the whey as you will need it to cook the cheese curds in it next.
Once you separate the curds you need to then shape them. At this point you can do either of these two things: 1. create a big rectangular slab of curd wrapped in a cheesecloth or 2. place the curds in special cheese containers or small ricotta strainers. Either way you need to squeeze out any whey left over by pressing the curds down and bind them together as firm as possible. However, forming one big rectangular curd requires a lot less effort and equipment on your behalf so I’m keeping that in the method for simplicity.
After pressing you will need to cut and cook the cheese curds you have been pressing. The recipe below has a recommended size based on the fact that the curds will expand while cooking and they will be folded over. In the end I make 3 large halloumi pieces but you may choose to cut them differently, based on your preference.

Step 4 – Cooking the cheese
The halloumi is cooked in the whey you reserved from the previous step. The whey is heated to 93-95°C and the halloumi is cooked for about 50min. During the cooking you will see them floating on the surface. It’s at this point that the halloumi is pasteurized if you are using raw milk. Important to note here that you need to monitor the temperature during the cooking time so it doesn’t rise too much. Finally the halloumi cheese is removed and allowed to cool slightly on a cheese mat or cooling rack.

Step 5 – Brining and storage
While the halloumi is still hot, but not too hot to burn your hands, press it on both sides with salt and mint, then fold to create the typical halloumi shape. Salt used here should be pure/non iodised (e.g. fine sea salt). Mint and salt are added for flavour but also both act as a preservative. These are the only additives used, which makes this cheese chemical free. Halloumi salted this way can be kept wrapped for about 3 days fresh in the fridge, otherwise you must freeze them. To enjoy the halloumi from frozen, simply thaw it in the fridge overnight.
On the other hand, instead of sprinkling a generous amount of salt on top you may prepare a brine solution to store it in. After the halloumi is cooked and cooled enough for you to touch, place some fresh mint leaves in the middle and fold it over. Add enough salt just to cover it lightly and then set aside to cool. After you have extracted the ricotta from the whey (step 6), get 1.5L of whey and add 120g of non-iodized salt to dissolve. Pour it in a clean sealable container (preferably glass) and allow it to cool. Once the brined whey (αλατισμένος νορός) is cooled, place the halloumi in and allow it to brine overnight before you can enjoy it. The 8% brined solution should be able to sustain the halloumi cheese for a few months in the fridge.

Step 6 – Extracting whey ricotta
Ricotta, which translates to recooked, is very well known as a byproduct dairy. Commonly made from whey after other cheeses have been cooked, although you may also use whole milk. This blog post is heavily focused on the process of making halloumi. However the ability to collect ricotta from the whey is quite rewarding despite the small amounts formed. Warm ricotta with some sugar/honey and cinnamon is definitely a winner. Or you may allow it to set in the ricotta basket for a few hours and cut it up.

Through traditional halloumi making, from most of the videos I watched, the ricotta is collected before the final cooking of the halloumi by just adding salt to the whey and letting the ricotta form. I tried that a few times and it did not quite work for me. Then at the halloumi festival I was presenting at I was speaking with George, one of the halloumi makers, who said they collect the ricotta in the very end by adding salt and citric acid. That way, as he explained, curds fallen off the halloumi during cooking also forms part of the ricotta. The citric acid is added when the temperature of the whey is between 85-87°C. At a temperature below that range I found that the ricotta takes a very long time to form. At a higher temperature I noticed that the ricotta is not as soft in texture, it’s grainier.

Ways to enjoy eating halloumi
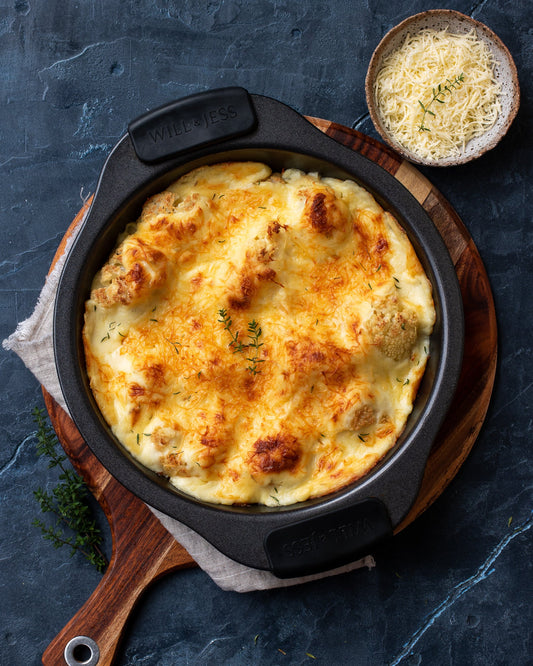
Halloumi is popular for its ability to grill without melting and its versatility in how it may be incorporated in dishes. It may be eaten fresh with watermelon or grated on pasta, fried, baked in savoury cakes or pastitsio, added as part of a filling like in ravioli or tiropites (cheese pies). You may even add small halloumi pieces in boiling soup and they do not melt, instead they just soften! The suggestions are endless…

4 comments
I found this recipe part way making Halloumi using a cheese making kit my mum bought me for Christmas. The whey looked really milky and I wondered if I could make ricotta and after a brief internet search ended up here. I didn’t have any citric acid to hand but did have malt vinegar so added the salt then enough vinegar to make the protein left in the whey solidify following your instructions about temperature and stirring and after draining I’ve got a really lovely mild cheese for breakfast tomorrow along with the Halloumi. It’s possibly a little bit grainy and I’ll get some citric acid for next time but I’m very pleased with how it turned out under the circumstances!
Hello! Just wondered with your recipe, how much Halloumi and ricotta does it make typically?
Undoubtedly one of the most concise on point recipes. Following the measurements, thorough and in-depth information given makes halloumi making a breeze. The instructional YouTube video is an added bonus. When my finished cheese had that squeak I was beyond myself feeling I had accomplished something I thought in the beginning would be too difficult but it wasn’t.
Do give it a go using Eleni’s blog it really is a rewarding and easy experience …… the final product is just pure heaven.
Such a detailed guide to such a complicated process! Never tried to make cheese at home before. Was pretty scared to start but I wanted halloumi so badly that after a few days of watching this video and reading all the notes I finally ordered the equipment and bought the milk. The whole process took around 4-5 hours for me mainly because I used a solid rennet and a super-slow electric stove. I was also panicking a few times that I spoiled 4L of milk but it turned out to be just panic. I believe next time will be faster.
The cheese is heavenly delicious and just perfect! It has this very halloumi texture and we have eaten it all in 2 days. I am looking forward to doing it once again soon.
Thank you so much for this recipe!