Kataifi With Halloumi And Pecorino

Kataifi with halloumi and pecorino is a recipe I put together inspired by the iconic Arabic dessert, Knafeh. I will not go on to say this is a Cypriot version of knafeh (just because I added halloumi) because I think that would definititely offend Arabic people. It is rather a sweet and savoury dish that I’d serve warm as a dessert after a meal but also for an afternoon treat with coffee. If you like eating popcorn with maltesers then you’ll love this!
Knafeh or Kunafeh is an Arab sweet with a number of spellings and pronunciations around the world. There are variations to this Middle Eastern dessert across a number of cultures but also within each household. I was first introduced to knafeh by the innovative Bearded Bakers. They brought their Jerusalem family version of knafeh to the streets of Sydney and Melbourne, on a shipping container turned bakery. That version had a creamy milk pudding with crispy semolina and a sweet syrup with pistachios added on top. Following that when we visited Dubai we had the other popular version. That had a mixture of just stringy cheese with kataifi, the syrup and pistachios on top. Both equally tasty, with familiar flavours such as the fragrant rosewater.

What is kataifi pastry
For the recipe I use kataifi pastry, which up until before I started blogging I actually thought it was phyllo pastry cut in very fine strings. But that is not quite right! Kataifi is made with a batter, forming thin strings on a hot metal plate. Watch this video to see it all forming. It is a very versatile to use in sweets or savoury dishes and may also be baked or fried. Can’t believe I haven’t created more dishes with it already!
The syrup for the kataifi
The syrup is very aromatic and fragrant with the addition of lemon juice and rosewater. As it is commonly seen when adding syrup to a dessert, it is important that one element is cooler in temperature than the other. That will allow the syrup to be absorbed better. In this case cold syrup is added to the hot kataifi as soon as it comes out, since the kataifi with halloumi and pecorino needs to be eaten warm.

The filling for the kataifi
For the Arabic version of knafeh the most common cheeses used are of goat’s/sheep’s origin including Nabulsi or Akkawi. They are not very salty, are mild in flavour and have the ability to melt when heated, leading to those delicious cheese pulled photos.
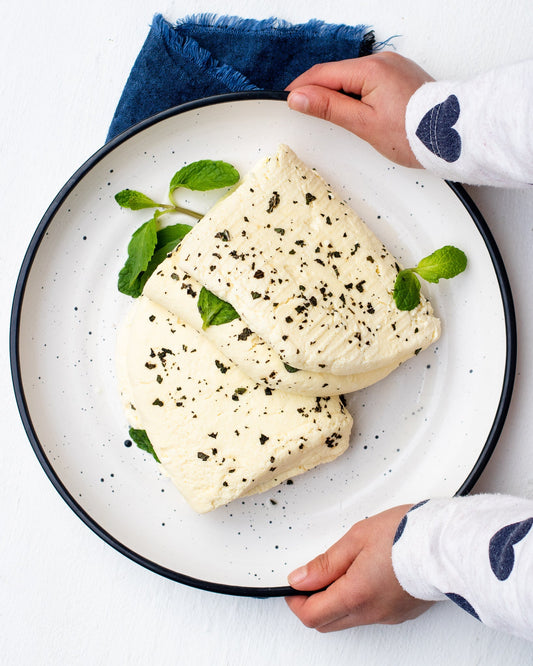
For the filling in my adaptation I included halloumi for its salty and strong flavoured characteristic. To balance that saltiness and to add that stringy texture to the dish I added fresh pecorino (have also tried it with mozzarella). Fresh pecorino has a very mild tangy flavour, made from fresh curd cheese and has the ability to stretch. Fresh pecorino should not be confused with the hard yellow coloured aged pecorino, which has a crumblier texture and has distinct sour notes to it. The extra aroma added to the filling, comes from the crushed mastic drops, which is a natural resin derived from mastic trees. Very popular on the Greek island Chios, where it is traditionally largely produced.
If you choose to not add the syrup on top, to enjoy the kataifi as a completely savoury dish, that is great also. However I would increase the ratio of fresh pecorino to halloumi cheese to balance out the saltiness. That may be determined on your own likings as well as how salty the halloumi is that you are using.


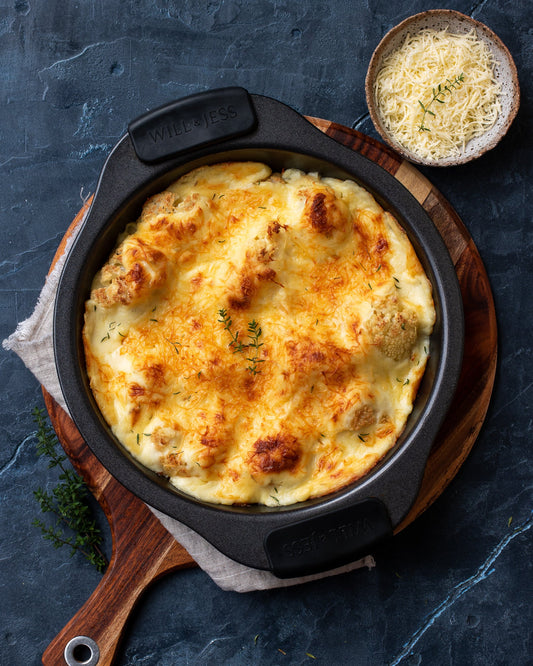
How to cook the kataifi
To cook the kataifi with halloumi and pecorino you may bake or fry it until the kataifi is beautifully golden brown and the filling is warm and melts away. I chose to bake the kataifi primarily because my current frying pans are a bit too small for all the ingredients I wanted to include. Seeing the fried version on a number of different videos, the assembly process would be the same. The cooking method varies slightly with cooking time reduced by some time on the stovetop in comparison to baking. It only takes about up to 8min on each side, on a low – medium heat, just enough time for the kataifi to turn a golden brown colour and the cheese to melt.

For more sweet creations, traditional and non, check out this link!